Building a custom pool in Arizona is an exciting way to turn your backyard into a luxurious retreat. However, many homeowners underestimate the time and steps involved, which can lead to frustrations and delays. This step-by-step guide from Desert Oasis Pools and Landscapes will provide you with a clear understanding of what to expect at each stage of the pool building process, from initial design to completion.
Step 1: Pool Design – 1 to 2 Weeks
The first phase of building a custom pool is the design process. During this step, you’ll work with a professional pool designer to bring your ideas to life and explore what’s possible within your space. Design consultations include discussing details like pool shape, depth, style, and add-ons. Modern 3D modeling software lets you visualize exactly how your pool will look, down to the last detail.
Key Steps:
- Meeting with a pool designer to discuss your vision
- Reviewing key features such as size, shape, and color
- Finalizing any custom features like tanning ledges, spas, or waterfalls
- Using 3D modeling for a realistic view of the final layout
After completing the design, you’ll have a clear picture of your future pool and can confidently move forward with the project.
Step 2: Permitting and Engineering – 4 to 8 Weeks
The permitting phase is crucial but often unpredictable. While some municipalities in Arizona, such as Chandler, Gilbert, and Mesa, process permits in a few weeks, others may take longer due to varying regional regulations and requirements. It’s not unusual for delays to occur if more information is needed or if there’s a high volume of applications.
Key Considerations:
- Your pool builder will handle the permit process, ensuring all necessary documents are filed
- Allow extra time for possible delays in municipal approvals
- Engineering plans may also need to be submitted during this phase
The permitting stage typically takes around 4 to 8 weeks but can sometimes be completed sooner. The wait can be frustrating, but having permits in order ensures that your project meets local building codes.
Step 3: Excavation – 1 to 2 Days
Once permits are secured, construction begins with excavation. Excavating the pool site generally takes just a day, although unforeseen challenges like encountering hard rock or clay (commonly found in Arizona) may extend this phase slightly. Limited access to your yard can also slow things down, but on average, excavation is quick and straightforward.
Potential Challenges:
- Hard rock or caliche, which can slow down digging
- Tight or limited backyard access for excavation equipment
After excavation, your yard will start to show the first signs of transformation.
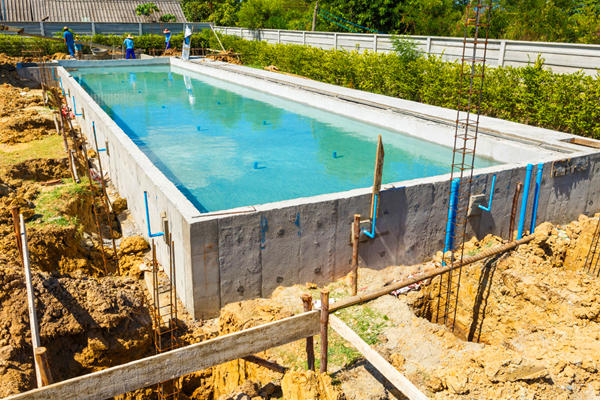
Step 4: Plumbing, Steel, Gas, and Electrical – 1 to 3 Days
The next step involves installing the essential systems that support your pool’s functionality and aesthetics. Plumbing, steel framework, electrical, and gas lines are put in place, forming the foundation of your pool. This stage also includes key inspections to ensure everything is up to code before the next steps. Depending on the complexity of your pool design, this phase typically takes one to three days but may require additional inspection time.
Features Installed:
- Plumbing for water circulation and filtration
- Steel framework for structural support
- Electrical wiring for lighting and water features
- Gas lines for options like hot tubs or outdoor kitchens
City inspections ensure these systems are properly installed and safe before moving to the next phase.
Step 5: Pool Shell Installation – 4 to 6 Weeks
Now it’s time to shape the heart of your pool. Shotcrete, a durable concrete material, is applied to form the pool shell. This phase requires patience, as the shell must cure properly to prevent cracks and ensure longevity. Although it may seem like progress has slowed, the curing process is vital to creating a strong, lasting pool structure.
Important Considerations:
- Shotcrete is sprayed to form the pool shell
- Curing time, typically several weeks, allows the concrete to set fully
- Inspecting the shell for any imperfections is essential before adding finishing touches
During this time, you may feel as though construction has paused, but curing ensures the pool’s structural integrity for years to come.
Final Steps: Pool Finishes, Landscaping, and Clean-Up – 2 to 3 Weeks
Once the pool shell has cured, the final stage involves adding finishing touches like tile, coping, and plaster, which give your pool its color and aesthetic appeal. This is also when any additional landscaping and custom features, like waterfalls or seating areas, are installed. Once the finish is complete, the pool is filled with water and tested to ensure everything is functioning as planned.
Finishing Steps:
- Adding tile, coping, and plaster to complete the pool’s look
- Landscaping and surrounding hardscapes to complement your backyard design
- Final inspection and water testing
After about two to three weeks of final touches, your pool will be ready for use, transforming your backyard into a stunning oasis.
Total Timeline: Approximately 8 to 12 Weeks
Building a custom pool in Arizona typically takes between 8 and 12 weeks from start to finish, depending on design complexity, permitting timelines, and any unexpected delays. By understanding each stage, you can plan effectively and look forward to enjoying your new pool as soon as it’s ready. At Desert Oasis Pools and Landscapes, we’re here to make this process as seamless and enjoyable as possible, creating the perfect retreat for your Arizona home.
